Upload data for Tables
Since data is the most vital component of every table, you begin by choosing one of the available data options: Try sample, Upload data, Google Sheets, Social Explorer, and Blank.
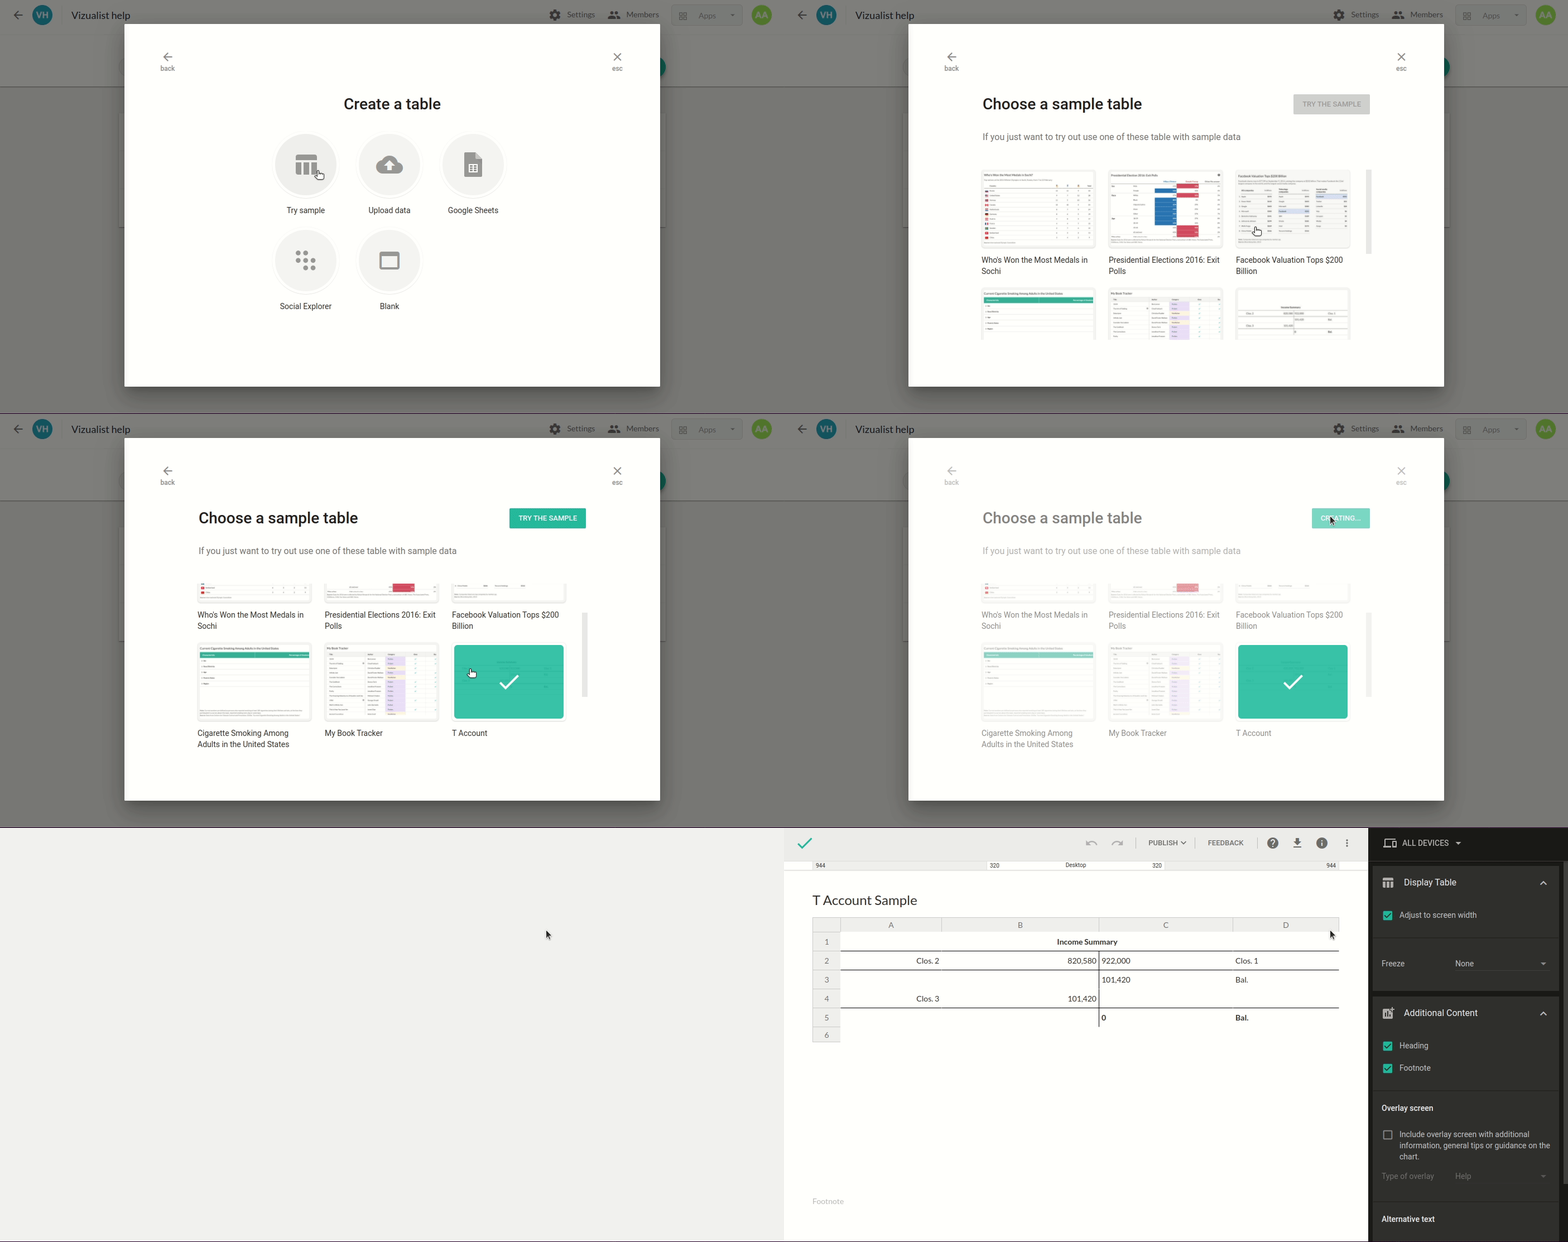
Try sample
If you want to try out a table with sample data follow these steps:
-
Select Try sample
-
Choose a sample table from the list
-
Click on Try the sample
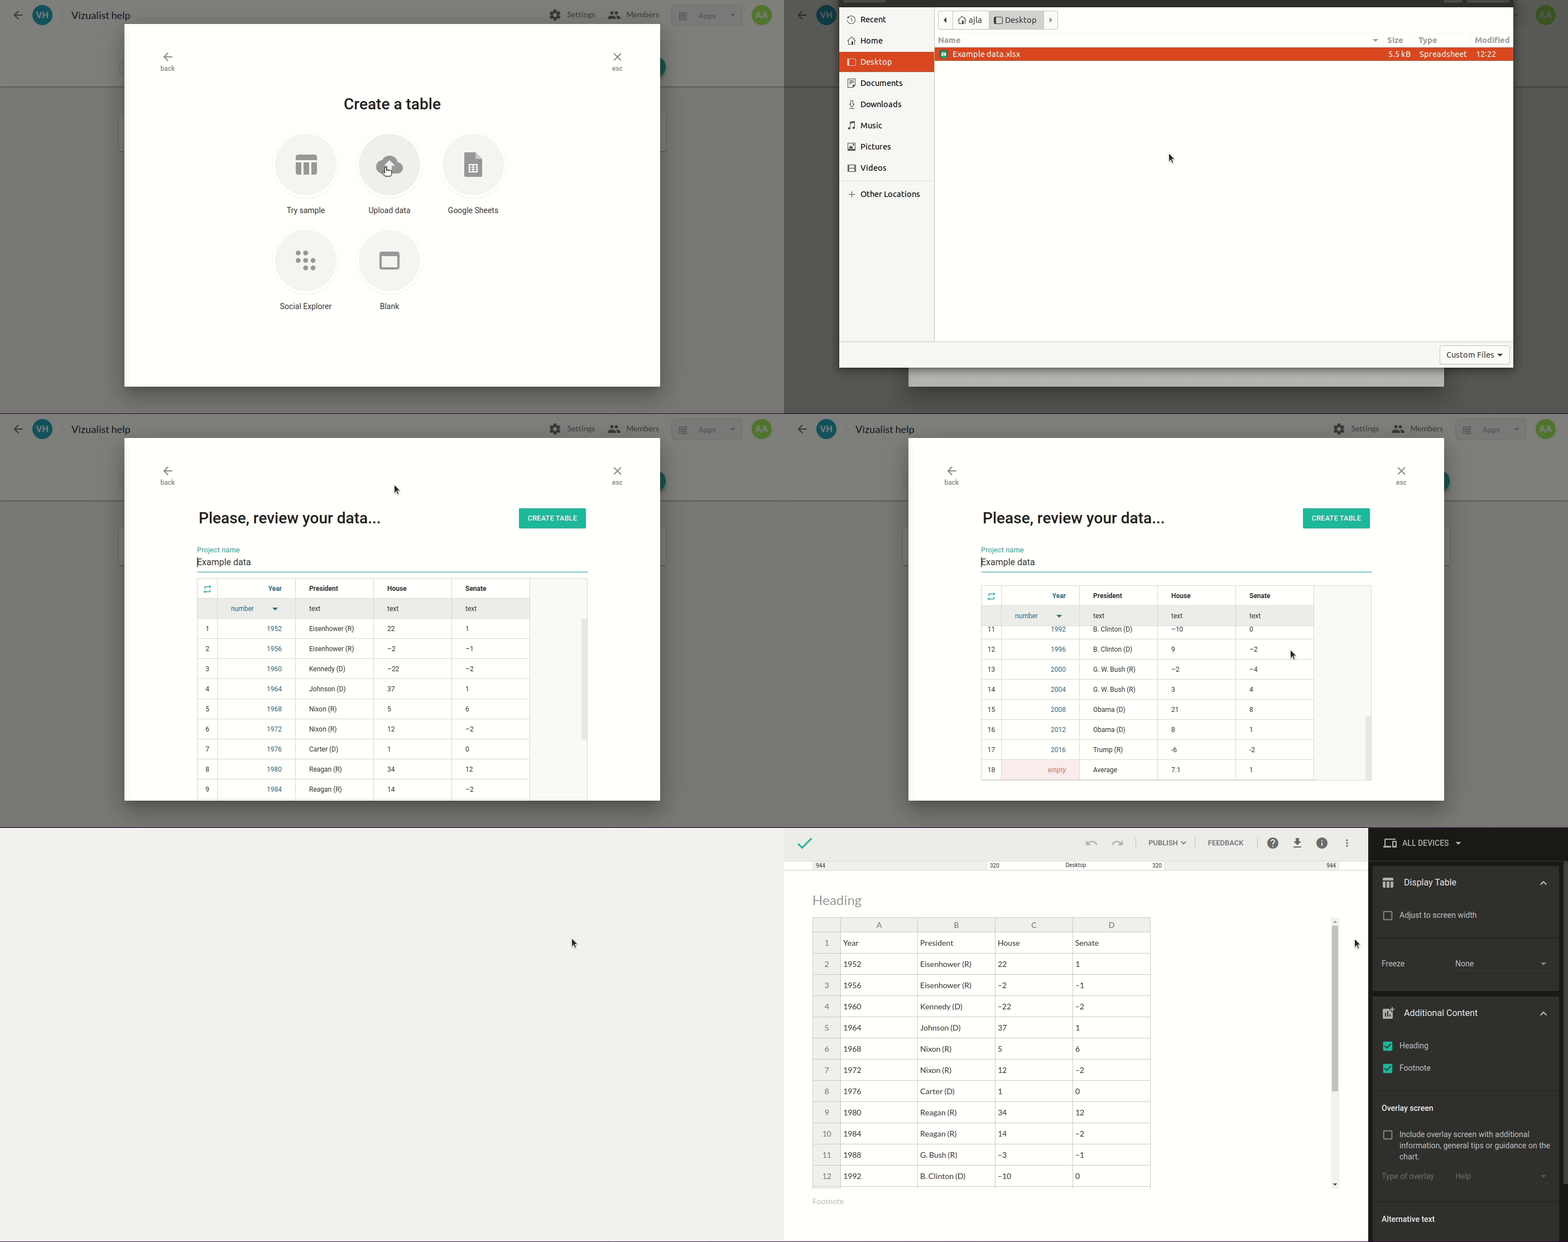
Upload data
Tables allow you to upload your data. To do so, please follow these steps:
-
Select Upload Data
-
Click on browse and select data you want to upload
-
In the Project name field, type in the name of your table
-
Click on Create table
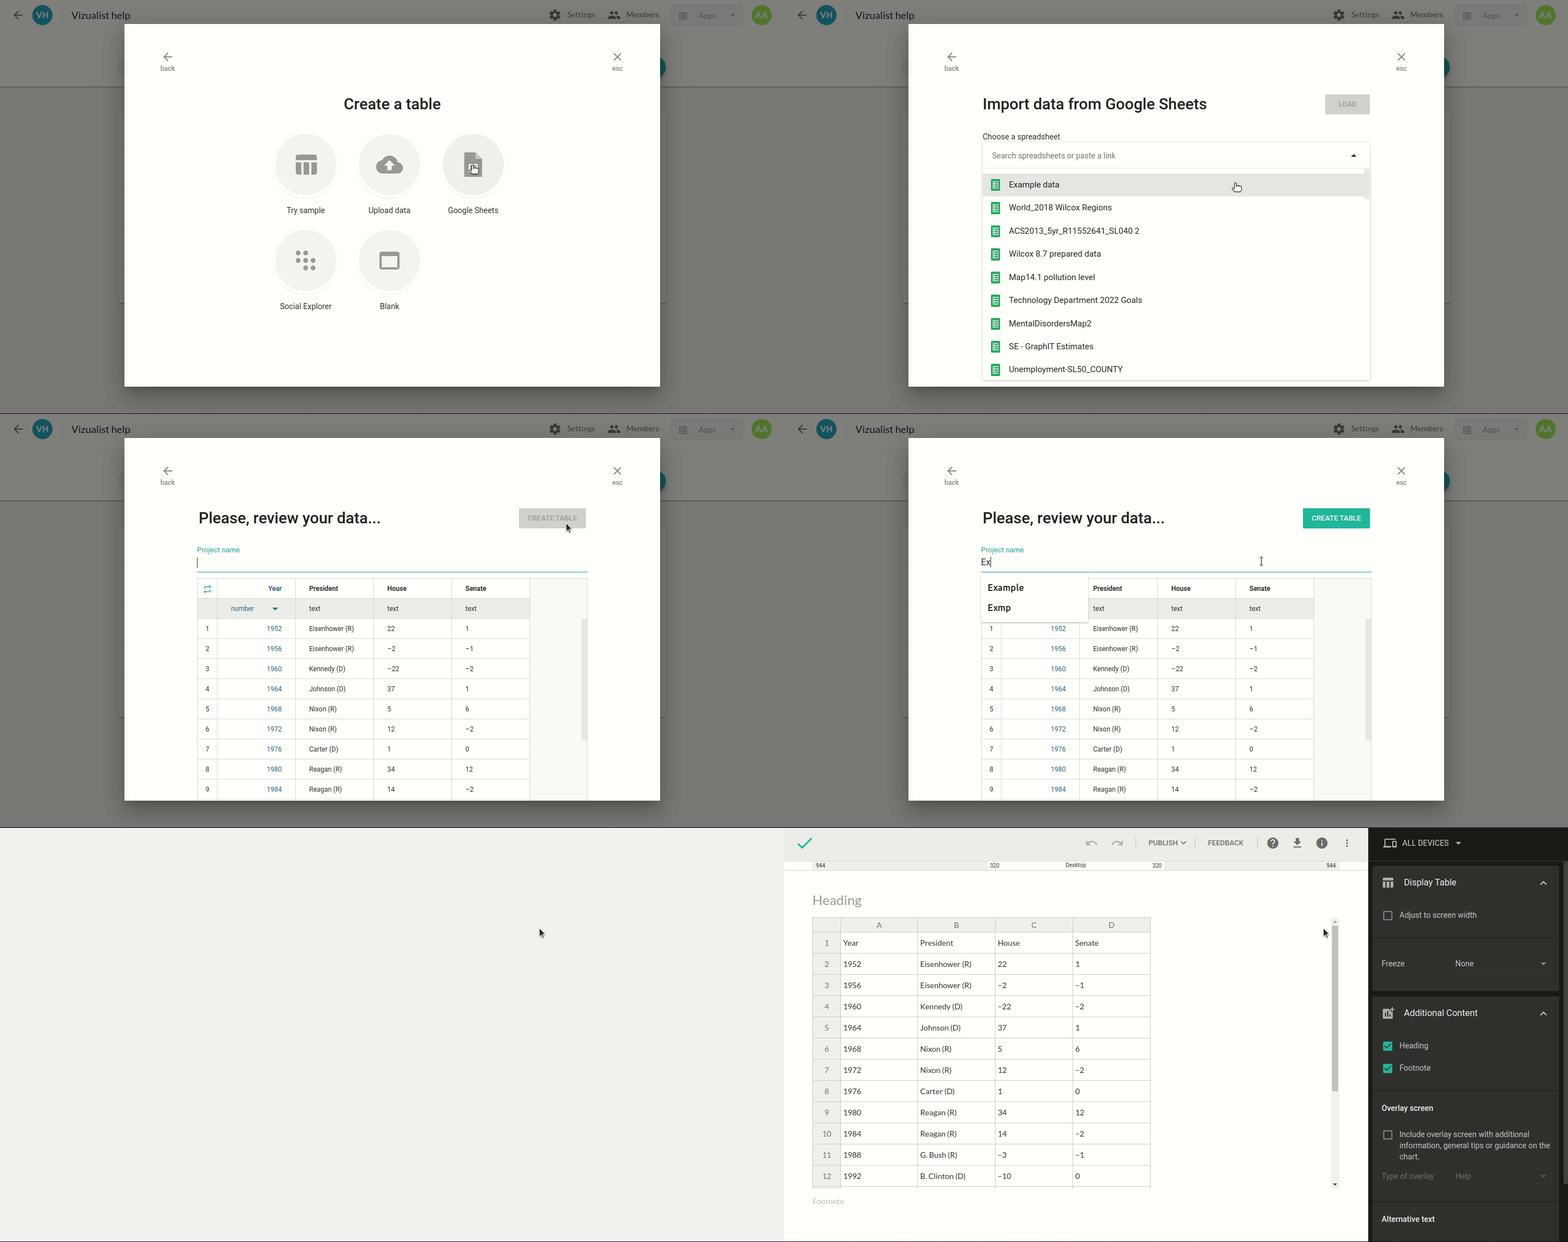
Google Sheets
Tables allow you to load data saved in Google Sheets. To create one, follow these steps:
-
Click on Google Sheets
-
Choose a spreadsheet or paste a link to the data
-
Click on Load data
-
Enter Project name
-
Click on Create Table
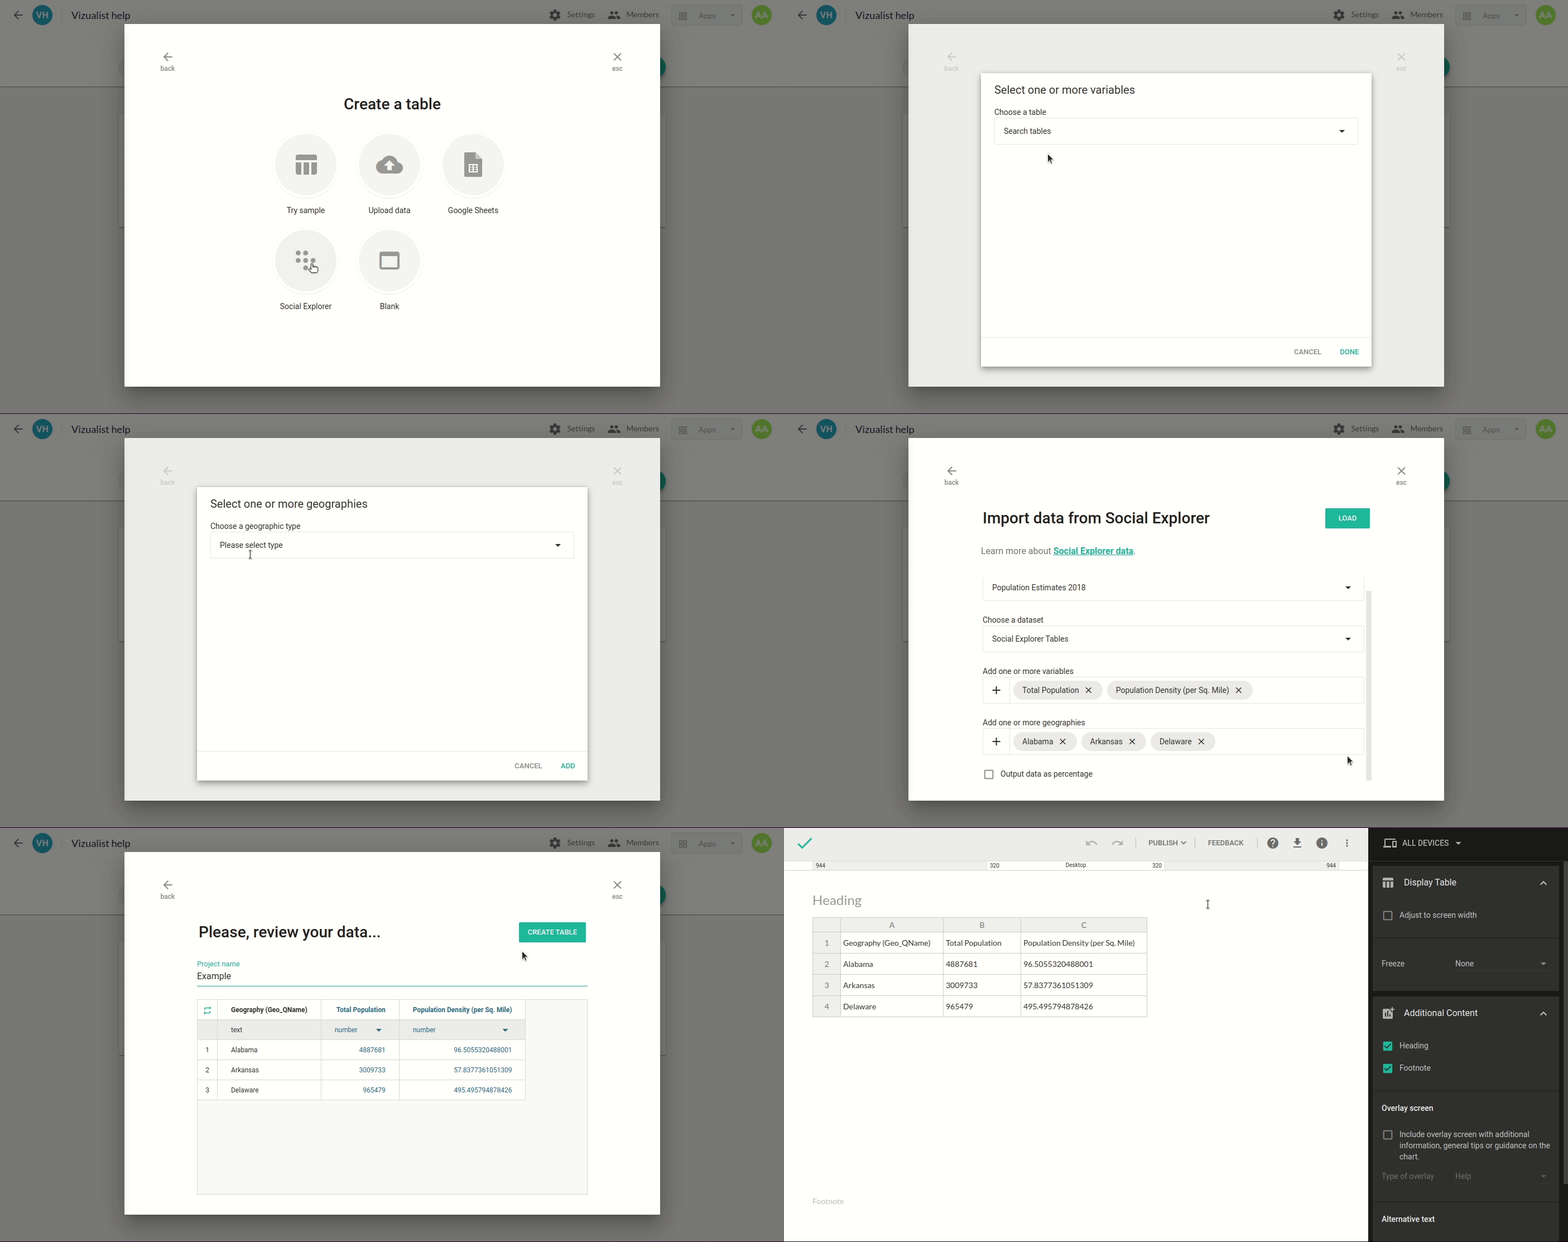
Social Explorer
Tables allow you to import datasets from Social Explorer when creating tables, giving you access to all Census Bureau's Decennial Census and American Community Survey data.
-
Click on Social Explorer
-
Choose a survey
-
Choose a dataset and add one or more variables and geographies
-
Click on Load
-
Enter Project name
-
Click on Create Table
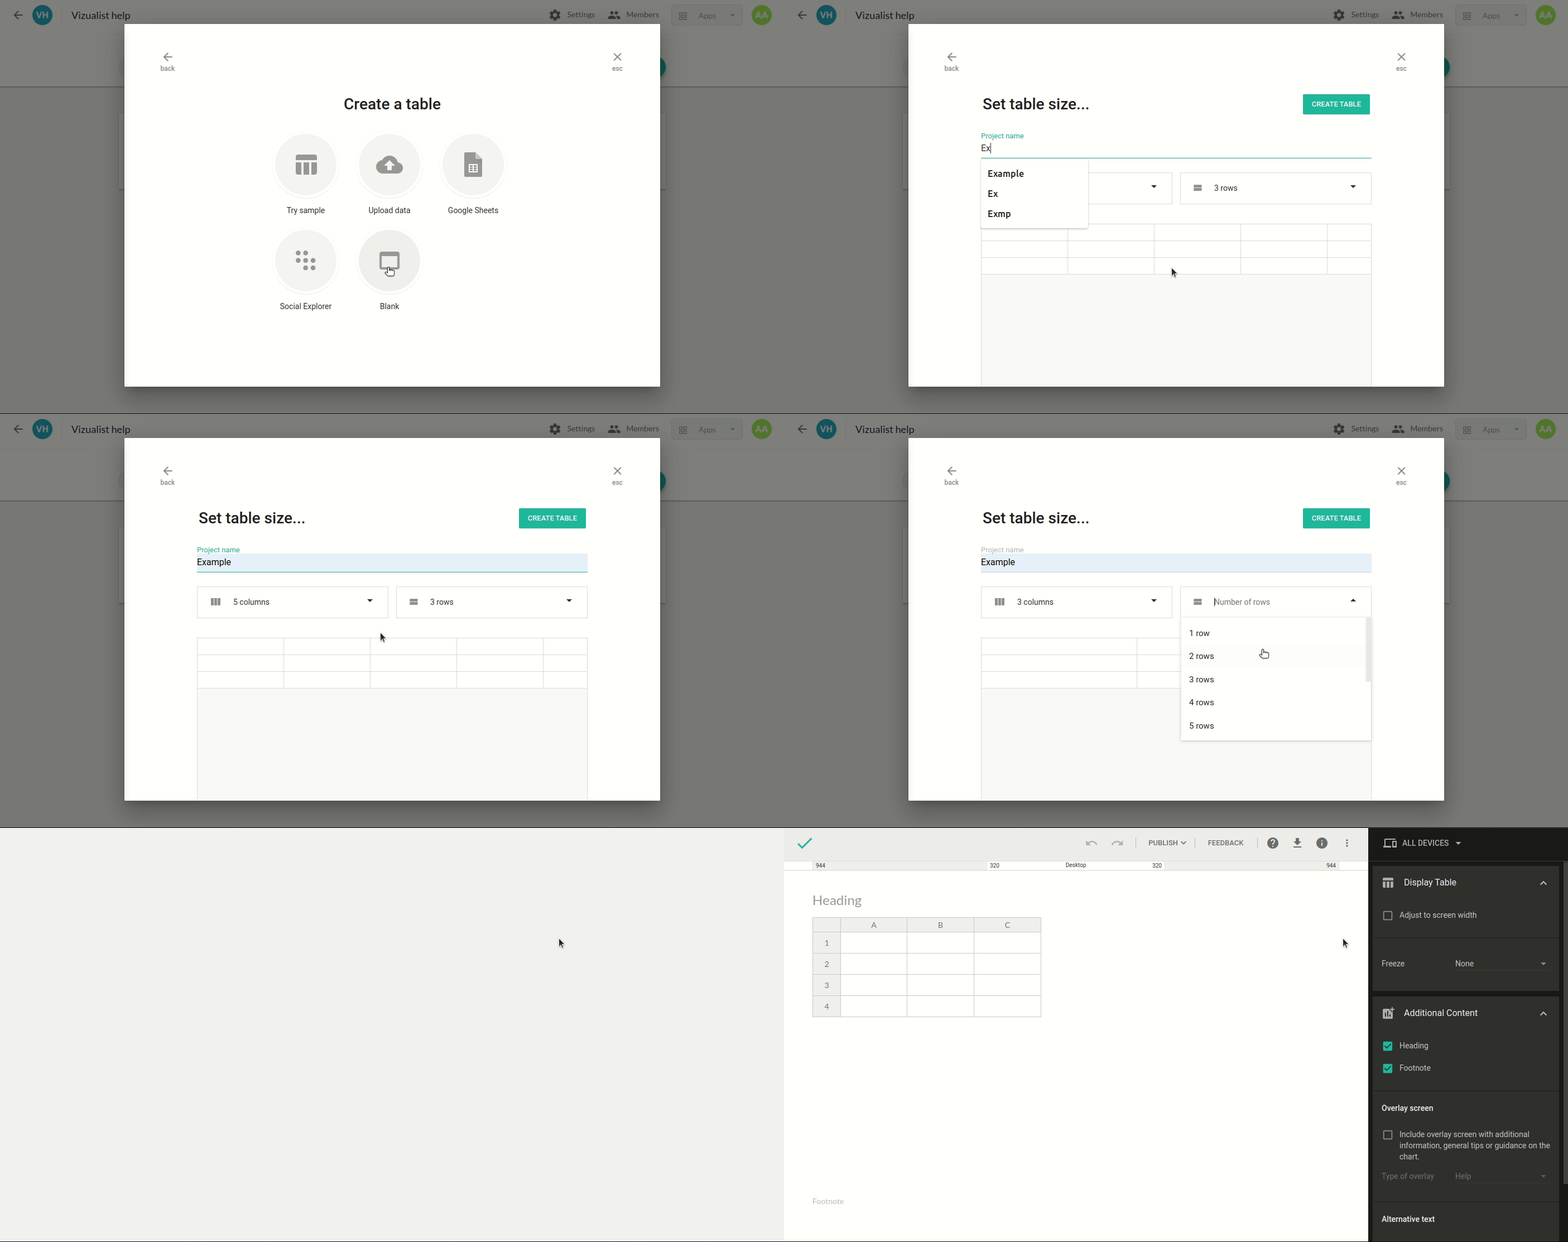
Blank
If you want to create a table of your own, follow these steps:
-
Select blank table
-
Enter project name
-
Specify the number of rows and columns by selecting the number from the dropdown or entering a specific number
-
Click on Create table
-
Add your data manually and edit cells as you wish.
