Create your first table
Tables is a powerful visualization tool designed with usability in mind. In just a couple of clicks, create a table that stands out, grabs attention, and instantly tells your story. Let's get you started.
Add your data
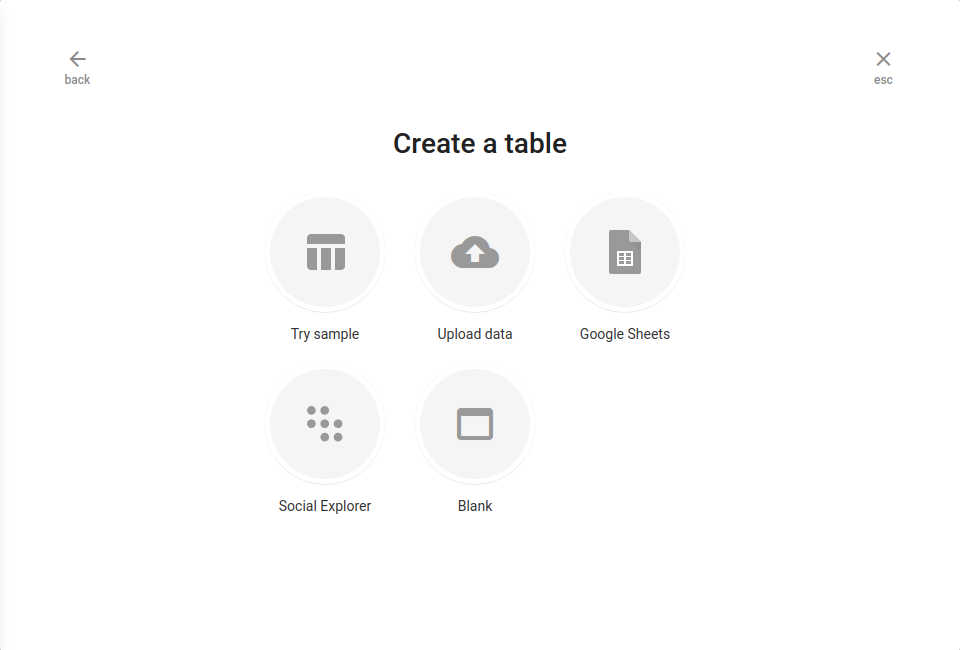
Start working on your first table by clicking the add on the right side of the Home page and choose Table. This will launch the Table Wizard window. Since data is the most vital component of every table, you begin by choosing one of the available data options: Try sample, Upload data, Google Sheets, Social Explorer, and Blank.

-
Try sample helps you create a table by providing sample data. If you would like to explore the Table, want to see how some table types look, or just need to create a table and update the data later, this step will lead you to a meaningful table in a single click.
-
Upload data allows you to upload your own data.
-
Google Sheets is fully supported by Tables. You can easily access all your Google Sheets as soon as you authenticate your account and grant access to Tables.
-
Social Explorer gives you access to all Census Bureau's Decennial Census and American Community Survey data.
-
Blank – gives you the ability to create your table by entering data and editing it manually.
If you want to know more about uploading data follow this link Upload data.
Customize your table
You've just created your first table. Now it’s time to make your table stand out. On the right-hand side of the editor, click the dropdown that shows the table options.
They split into two sections:
-
Display table
-
Additional content
To edit cell/s, click on the cell you want to edit and choose the option from the toolbar list.
Display Table
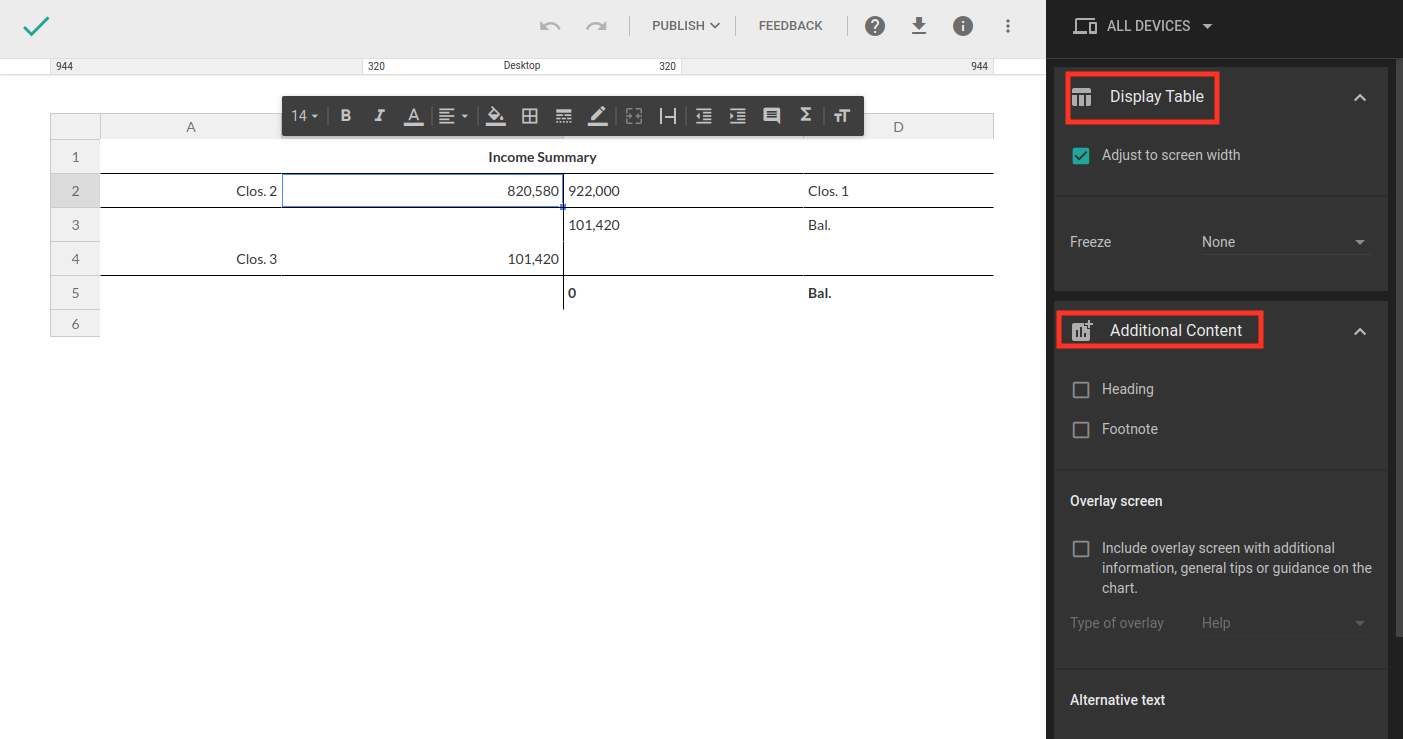
Inside the “Display table” you can find two options:
-
Adjust to screen width
-
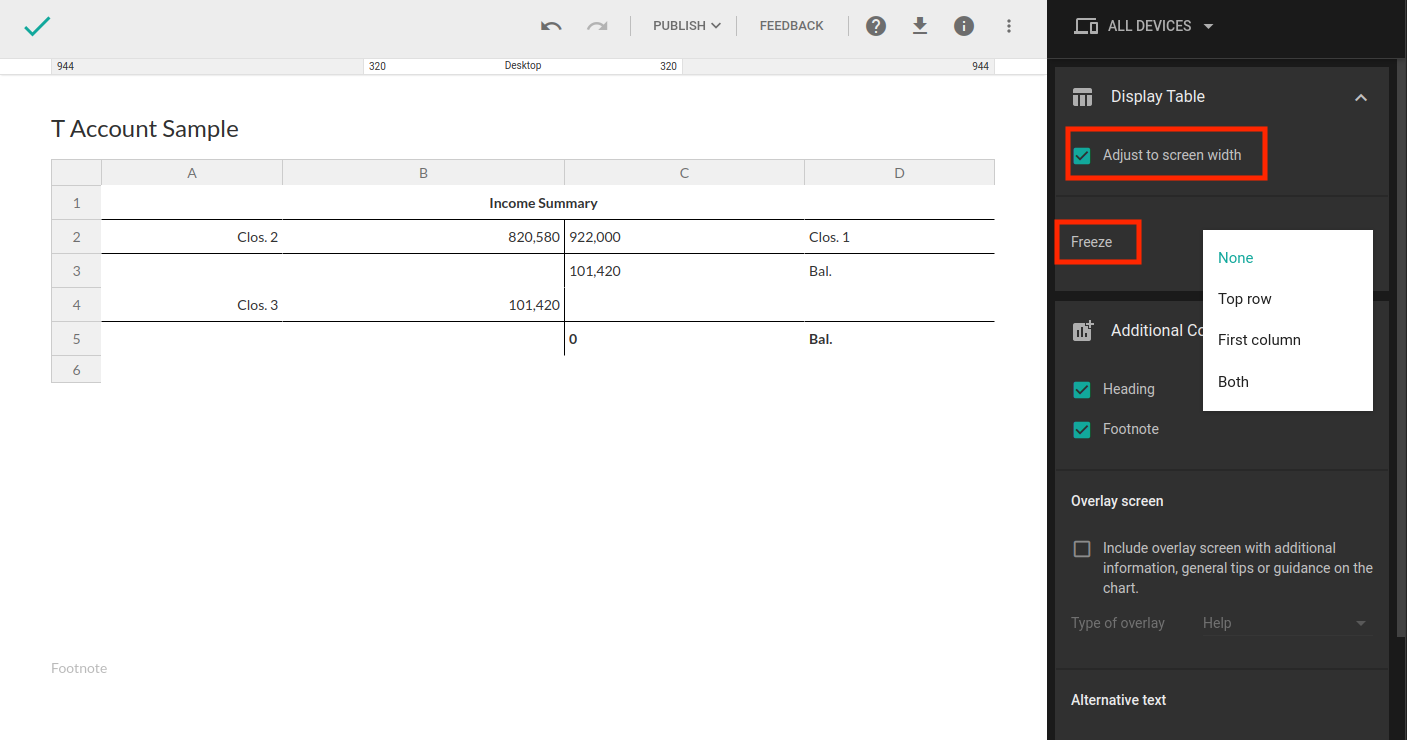
Freeze
Adjust to screen width – This option will help you adjust the table to be responsive on every screen. To enable this option, click on the checkbox.
Freeze – This option can freeze the top row, first column, or both of them. You can disable it by choosing the "None" option from the list.
Additional Content
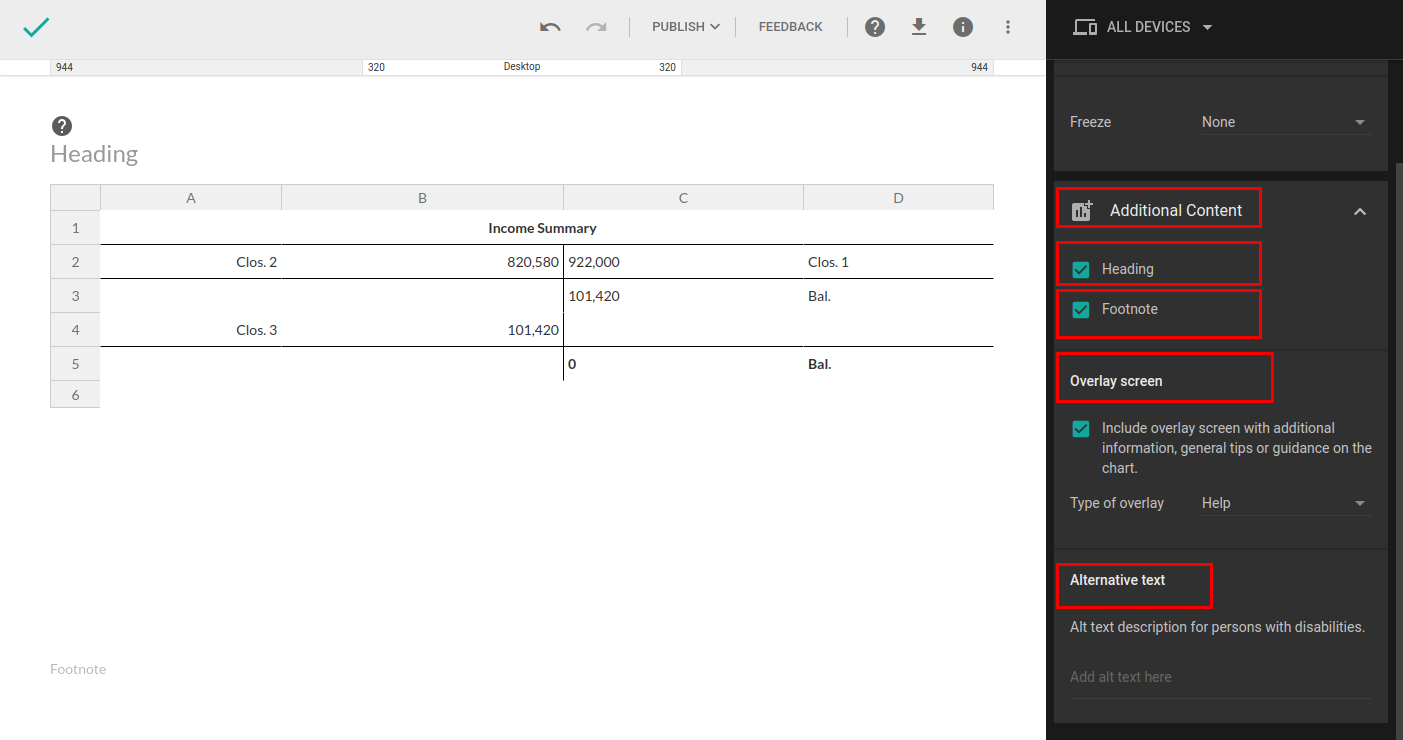
Heading and footnote are available right under the Additional Content section, where you can add overlay screens and alternative text as well.
Heading
With the heading option, add a title to your table. When you select this, you will see the placeholder above the table where you can enter your title. To add a title, follow these steps:
-
In the right-hand sidebar, click Additional Content to open the dropdown menu.
-
Click the checkbox to enable option.
Footnote
You can add interesting comments or information about your table with this option.
-
In the right-hand sidebar, click Additional Content to open the dropdown menu.
-
Click the checkbox to enable Footnotes. It will show up in the lower-left corner.
Overlay Screen
-
In the right-hand sidebar, click Additional Content to open the dropdown menu.
-
Click the checkbox to enable the overlay screen.
-
Select the overlay type from the dropdown.
-
Click the question mark icon
to open the overlay screen.
-
Enter the text and click X when you're done to save it.
Alternative text
Accessibility is the practice of making a website usable by as many people as possible, including users with visual impairment. Many of them are using screen magnifiers and/or screen readers. A screen reader uses a Text-To-Speech (TTS) engine to turn information displayed on the screen into speech.
Publish and Share projects
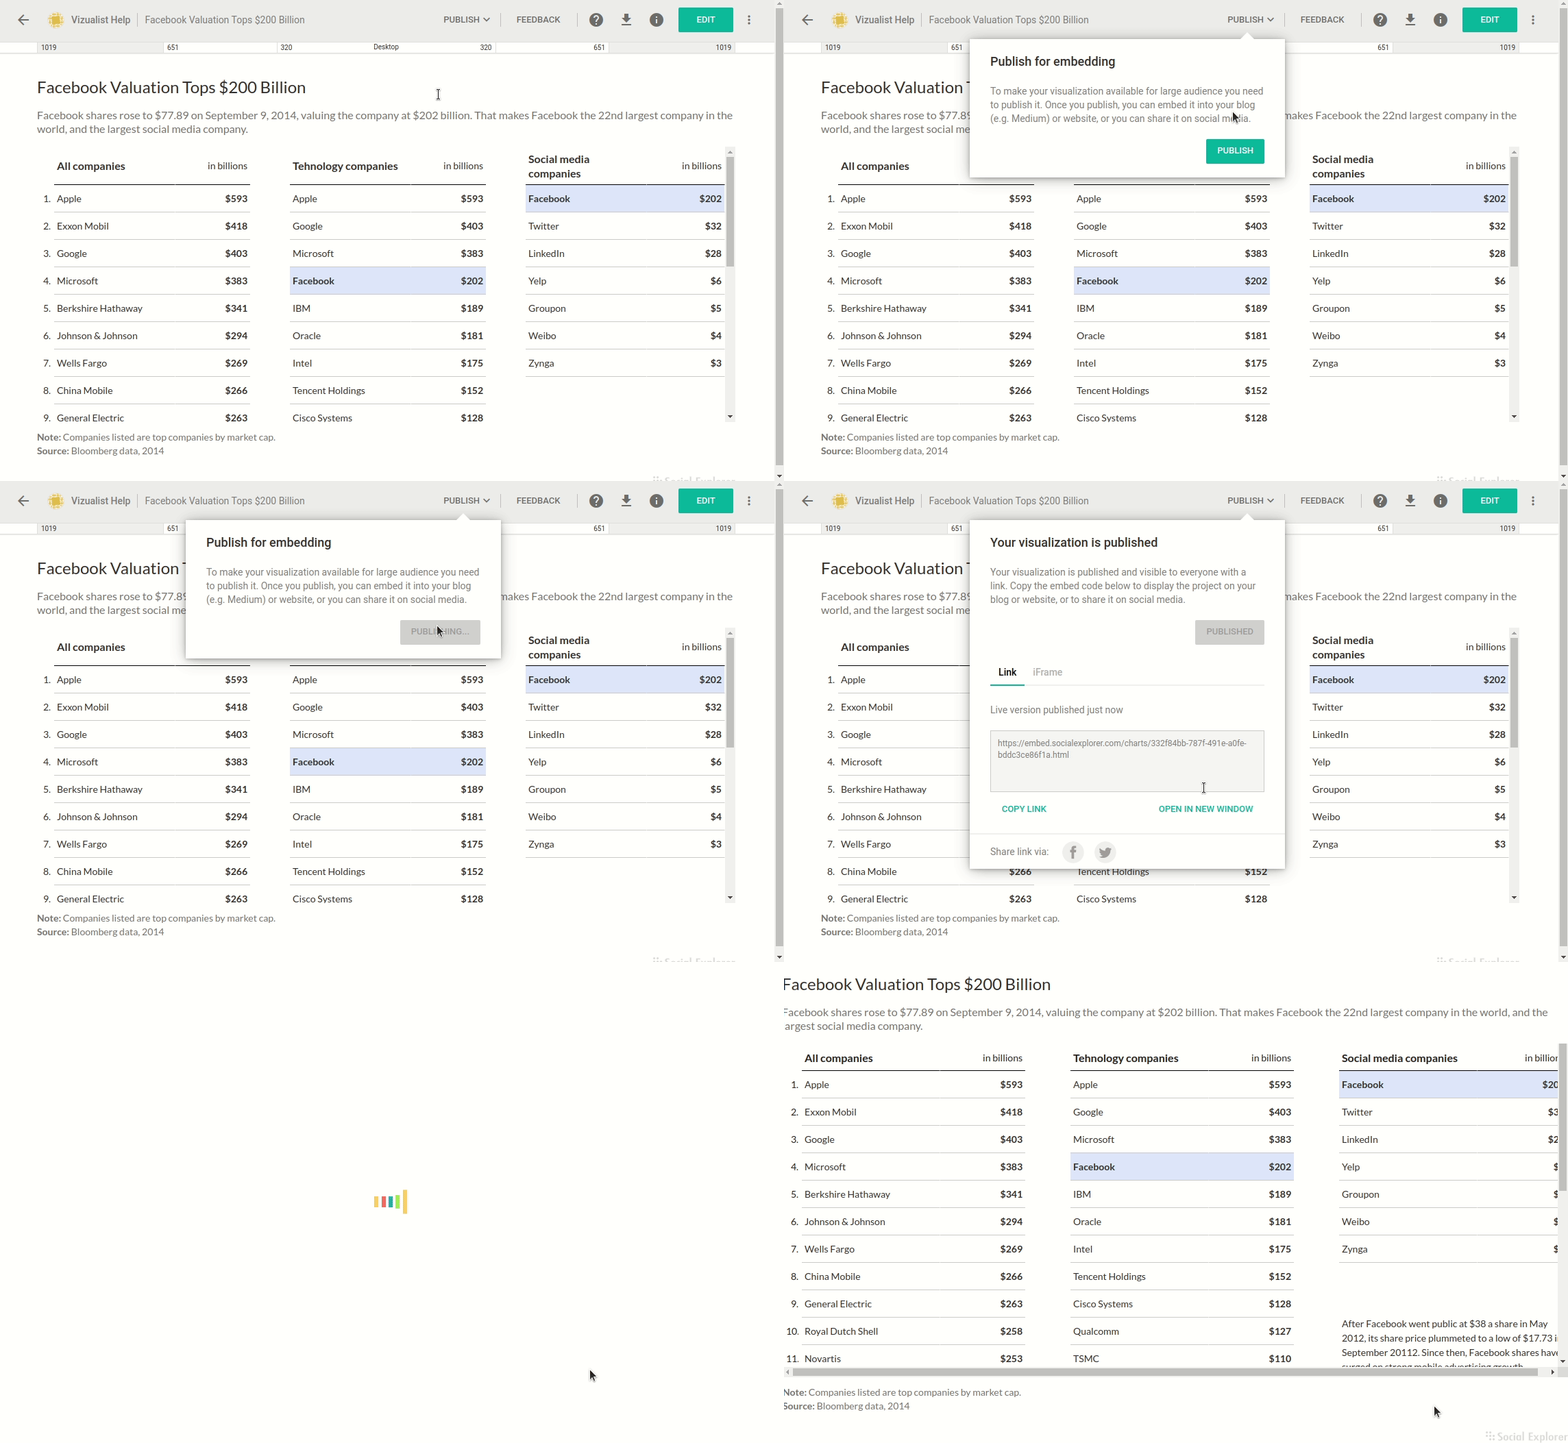
In this video you will become familiar with our Publish feature. Learn how to use projects for collaboration and share tables across different platforms.
